Showing posts with label crafts. Show all posts

Saturday, September 5, 2020

A Quilt Repair While I Was On Vacation

 I went to visit my parents for a month and while I was there I repaired a quilt.


Sorry the image is not very good, it was taken with my phone and I'm still trying to figure out how to use it.  This Drunkard's Path quilt was the last one my Nana made.  Started in the 70's, the top was finished in the 90's and sent to someone else for quilting as Nana could not quilt anymore.
I cut out the pieces that needed replacing - they had holes that looked like a mouse chewed on them.
This is the whole quilt laid out on the floor.  If you look closely you will see some darker pieces in the center area, these were the ones I replaced already when I took this photo.  Thankfully we still had some of the blue fabric so that made it easy.  I still have some of that fabric for just in case.

I did not get a photo of the completed project, we got too busy with other things.  

Tuesday, July 21, 2020

Meet Dottie! My New/Old Sewing Machine

Meet my new sewing machine Dottie. 

She's a 1940 model with a very heavy wood cabinet, which needs a little love on the outside. 


She needs new wires that actually have a covering, yikes! 

But she moves freely when I spin the wheel and has 4 boxes of attachments. 
Best of all I got her for $20 at a yard sale. 

She's not the treadle machine I wanted but she will do what I need her to do after rewiring and a bit more cleaning. Refinishing the cabinet will come later.

Monday, May 25, 2020

Completed Repaired Quilt

I finished the quilt repair and here are the final photos.
The replacement fabrics in this photo are the yellow and the pink floral just above Elma's name.
In this photo you can see the quilt is twin sized.  I replaced 14 of the original triangle pieces.  One was not really bad enough but the original maker had matched the fabric on facing squares so I followed that pattern.
I left the original fabric below the appliqued new pieces and tried to match the colorations as best I could.  The backing was in wonderful condition so when I did the quilting on the new pieces I only sewed through the top and the batting, not going all the way through the back.  That way the original quilting is still there and the new pieces are still quilted in the same pattern as the old.  On a few places all I needed to to was to insert a tiny piece of fabric and do a buttonhole stitch around the hole.
The owner was very happy with it!

Monday, May 18, 2020

Repairing An Antique Quilt

My upstairs neighbor asked if I knew how to fix an old quilt that her grandmother made.  
As you can see, some of the fabrics are in shreds with the cotton batting poking out.
I explained how I repair quilts, I applique over the damaged area, leaving the original fabric for posterity, then requilt following the same stitching.
The polka dot fabric is a piece of the new fabric.  I usually use the wrong side out so that the colors are not so bright that it looks odd.  I can rarely find fabrics in the right tint to match old and faded colors.
I like how the strips between the clover shaped squares have embroidered signatures and quite a few have year dates.  The earliest is this one from 1934 and the others are dated through 1937.
I love quilts like these, true treasures and so worth saving for future generations no matter how bad the condition is.  
I'll post next week when I am finished with the quilting and will try to get a shot of the full quilt, it's a twin size.

Tuesday, May 5, 2020

A Few More Buildings for the Train Layout

I made some more buildings for the train layout, this time a portion of a town backed up to what will be the side of a mountain.
Just ignore all the cardboard stuff, everything is still in the planning stage as far as topography.
The base is a piece of cardboard and I covered it with felt and used some craft paint to vary the color.
Here's another angle.  I used some old track that I cut apart and glued down for the wood sidewalks, and painted it gray for weathering.  The detail on these paper buildings is great.

I did do a little kit bashing to make it work for what I wanted and I add cereal box pasteboard to the insides for stability as these are printed on cardstock.

I will be adding some real rocks and weedy bushes at some point, it will make it look more real.  And we definitely need to start adding some model people.  For scale, the large buildings are 1.5" x 3.5".  The printed paper is much easier on my eyes that scratch built buildings.

And if anyone is looking for N scale or Z scale models, here is the link to the Etsy store: CustomZScales

Tuesday, April 28, 2020

A New Station Office for the Train Layout

I ordered some pre-printed buildings for the man's train layout.  I really like how they go together and the printing on the cardstock is excellent.
He opted to use this 1st one I built as a station office and put it next to the 2 story warehouse I built from scratch.
The warehouse looks huge next to the little office but the top of the train fits just under the roof when it goes by.
That's his new engine, still has some of the packing in place - the white stuff.
And the caboose!

Wednesday, April 22, 2020

Upcycled Tote Bag

I've been doing a lot of reading the past few weeks with some small clothing repairs thrown in, all hand sewing as I have no machine at this time.  Then I came up with this project....
This started out as a an old Trader Joe's bag that someone was going to throw out.  It was still sturdy but looked really tacky with the printing on the outside peeling off.
I had a bag of scraps someone was getting rid of so I cut 5" squares and made strips of 6 squares.  I covered the handles and started sewing the strips to the bag in a diagonal line.  Then I covered the bottom and used 1 row to line the inside top.
I also added a pocket inside with leftover squares.
A very sturdy tote bag to carry stuff for our Thursday craft nights, whenever they resume.

Tuesday, March 24, 2020

Miniatures for the Train Layout

I've made a couple of items for the man's N scale train layout.
This one is a warehouse for offloading items.  Made with cereal box cardboard and covered in cardstock that is colored with prismacolors, the photo is not great, it is drawn with a tiny brick grid.  The double doors show one partially opened on this side, the other side they are closed.  The roof is cereal box too but just painted with silver & brown acrylic craft paint.  The shape of the roof is like some buildings here in CO, made so the snow falls off easily.

This is an old time passenger car.  The basic shape the man cut out of styrofoam.  I refined it by sanding with a nail file and added the top window portion they used back then.  Painted with silver acrylic and detailed with black sharpie.  The sides are cardstock cut to fit and colored with prismacolors.  He added the wheels.  It sits next to a 3 story hotel that used to be in this town - the RR actually ran beside it in order to let passengers board and unboard.  As you can see he's trying out things for landscaping.

Tuesday, February 25, 2020

See My Upcycled Shower Curtain!

I needed a new shower curtain as the one we had was very dark and not our style.  It's a postage stamp bathroom to light colors are much better.
I had a summer bedspread made of unbleached muslin and embroidered in a variety of bright colors.  It was almost a perfect fit, just had to cut off 10" from the bottom.
Then I added button holes to the top to slip over the hangers.
Quick & easy stitching project!

We love it!  And yes, there is a liner on the inside.

Tuesday, February 11, 2020

A New Bracelet to Help with Pain

I made this bracelet with chunks of raw amber, hematite beads and clear quartz crystal.  There are also some small glass beads.
I chose this combination not only because the colors are pretty but because all 3 stones help with pain.  I've used hematite before with an injury but have also found that amber does indeed help alleviate pain for me.  Clear quartz is supposed to enhance the effects.
I have bracelets and necklaces with these stones already so this one will be going up for sale.

Tuesday, January 21, 2020

Newly Re-Painted Vintage Nativity Set

I finally finished re-painting the nativity set, sealed it, let it cure for a week, took a photo and then packed it away until December.
I chose more muted colors and did a lot of dry brushing.  The animals in particular turned out fabulous as the dry brushing lets you layer color and you get a look of real fur.  I also made one of the camels a reddish color as their fur color varies according to photos I looked at.  I made Mary's cloak a more subdued color but still used a pearlescent highlighting.  I figured the Magi probably would have given her a gift of a warm cloak as well as those gifts for the Christ child. 

Friday, January 17, 2020

Tuesday, December 31, 2019

How I Made a Down Pillow For Free

My s/o's chiropractor suggested he get a down filled pillow, but the fully down filled ones are $75 & up.  So made him one for Christmas and it cost nothing!

I had an old cotton sheet that I saved for crafty things.  The pillow is a little smaller than a standard pillow but it's big enough.  I embroidered words around the edges - good dream wishes. 

And about 2 weeks ago someone cleaning out their apartment had thrown 2 down filled jackets in the trash bin.  One was really worn and had holes, the other had a broken zipper.  I debated donating them but figured they would just get thrown out again by the thrift store.  So I removed the outer and inner fabrics.  Inside that was 2 more layers sewn into pockets that were filled with goose down.  One at a time I cut the pockets off and transferred the feathers into the pillow.  Took me three days working at night after my s/o went to bed.  I kept wearing the same clothes to work in because the down was stuck all over them.  Thankfully the feathery fluff blended into the carpet enough he didn't notice them the one time he came in my room and I vacuumed them all up when he was at work.  

I don't have a sewing machine so this was all sewn by hand.  And yes, he loves his pillow.

If you should want to try this I would highly recommend to work outside on a non-windy day when dealing with feathers of any kind.  And if you work with feathers other than down, use the heavy ticking fabric so they don't poke out.  Here's a link to a post about some I made some years back.

Tuesday, December 17, 2019

Making Socks Fit

It's cold here in Colorado at 7700 feet elevation in the middle of December.  
My feet were staying cold so my sweetheart gave me a pair of his wool socks, but my legs are wide so I had to make some modifications so the circulation didn't get cut off.
I split the socks from the top to the ankle and whip stitched the edges so they would not ravel.
Then I cut up a pair of black socks I had - into a triangle from the top to the ankle and whipstitched those raw edges.
Then sewed the 2 parts together.  Worked great, the socks fit without binding and keep my toes toasty!

Tuesday, December 10, 2019

Hoping to Sell Some Stocking Stuffers

Online sales have been very hit or miss.  I knew downsizing to move and then shutting everything down for 2 weeks would hurt, just didn't know how much.
Anyway I came up with some inexpensive stocking stuffer notebooks to see how they might do.

They vary a bit in size, 2.5"x4", 2.5"x5" & 3"x5".  Each has 208 pages, most are lined.  These are perfect for a pocket or a purse.  
I need to make one for myself!

Tuesday, November 12, 2019

Christmas & Winter Themed Blank Journals

Two more journals completed and up for sale.
A Christmas / Winter themed blank journal with a few pages with Christmas images.  Lovely red berry fabric cover and 164 pages sewn in with peppermint twist butcher's twine.
A Winter theme blank journal with a starry fabric cover.  This one has 232 pages of various paper and star punch outs throughout for fun.
Both are ready for someone to fill with their thoughts, drawings, photos & mementos.

Tuesday, November 5, 2019

New Journals for the Holidays

I've gotten 2 more journals completed and up for sale.  One is a gratitude journal with an autumn color theme and the other is a Christmas journal.  I have left a lot of blank space for the buyer/receiver to add in all their own journaling, keepsakes and photos.
Yes, this is a shameless plug for my items that are for sale.  It's how I earn money right now as I search for work outside of home.  You can find all my journals in my Ebay store, Etsy shop & Poshmark closet.  The links are in the sidebar.

For those just interested in seeing the journals, enjoy the photos and thanks so much to everyone for stopping by.

Gratitude Journal


Christmas Journal


Friday, October 25, 2019

A Small Quilt Repair

I just moved from Texas to Colorado, a big change for me.  Part of the family treasures are the quilts my Nana made.  This one pictured below is a twin size made in the 1930s at my best guess.
So here's my sewing for this week!
Sorry the photo is not better, the sunlight was filtering through the window, which is tinted.
This quilt has had much use and I remember sleeping under it many a time.  You can't see from this photo but some of the fabric is threadbare  and some were just in shreds with holes where the cotton batting was poking through.
The top center dark square, the 3rd row center dark square, the 4th row center square and a bottom one you can't see in this photo, were appliqued over the shredded part to keep it from getting further damaged.  I only found 2 fabrics here at Walmart that sort of worked.  The dark has red cherries but I know the background is too dark.  The 4th ros center square was a bright red with black polka dots, I used it wrong side out and it worked very well.  That's a trick I have used a lot in the past.  It gives the right amount of fading.
The edges are all frayed but I really don't want to 'redo' this quilt as hanging on the wall is the only use it will have besides being folded on a shelf.
I also used a piece of an old cotton sheet to make a sleeve to hang it up, all that I added are easily removed should I choose to.

Tuesday, September 17, 2019

Hallowe'en is Coming! Goth Journal

I've been working on 2 goth / Hallowe'en journals, really more like scrapbooks for someone to add in their own mementos, drawings & thoughts.
Here's the first one done.
Spiderwebs!  Beaded spine in black of course.  The elastic bookmark has a silver circle charm.
The edges of the signature covers have cobweb looking vintage lace.
Looks cool when the book is closed.
I even had a piece of spiderweb embossed paper, though you probably can't tell very well, it's the small piece laying on the red.
I'm working on another with a sugar skull cover!


Tuesday, September 10, 2019

Journals for an Artist's Work

I have spent 4 days working on 3 journals as gifts for someone.  The journals are not fancy, they are mostly just functional, it's what's inside that's important.
3 sizes to suit the items inside and note how thick the red one is.  It has 5 signatures.  The blue one, the largest is 9 x 12" and had to be to accommodate what went inside.  The person these are for inherited artwork drawn by his grandfather and they haven't been stored very well.  So I took them out of the ziploc bags and envelopes and out of the shed they had been in and gave them new homes that hopefully will keep them safe for years.
I want to show you some of the artwork done by a man who did them in his spare time as a hobby.  The blue journal holds drawings from the 1940's, WWII era.
He used whatever he could find to draw on and used mostly no.2 pencils with the occasional ball point pen, some colored pencils and even a couple with crayon.  On this portrait he used tracing paper and it is so fragile the edges are shredding.  In case you are wondering about the little strips of paper, they hold the drawings in place without having to glue anything but the strips.
click on the images to see them larger.
He seemed to have loved humor judging from some of his drawings.  The cartoon is on a scrap of writing paper, Gussie and many other pieces were drawn on the back of pasteboard signs from the railroad company he worked for.  Most of his work from the 40's is full page size and there are a lot of female nudes as well.
The red journal is filled with drawings from the mid 1970s and they are mostly ranch scenes.  And it's the same ranch and same lake in each one.  The full page drawings are mostly on some sort of cardstock that looks like it might have been the backing to a notepad or something. I believe these were done after he retired.

A handsome cowboy on a random sheet of blue paper.
Some smaller pieces done with colored pencil.  You can see here how many pages I had to use.
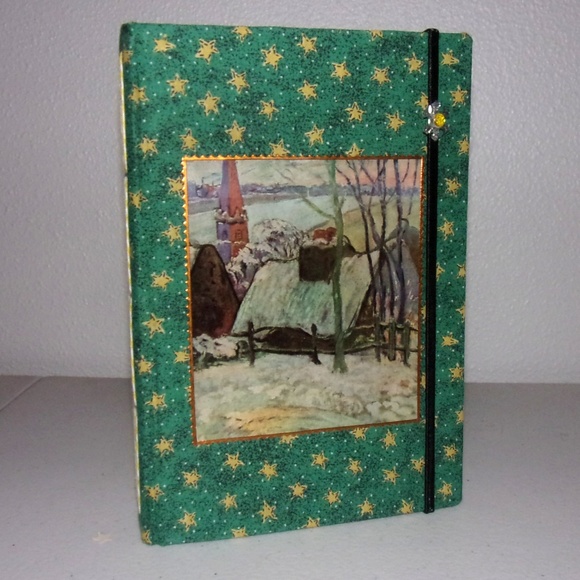
The green journal is novel sized and I believe they were all done in the mid 1970s also, with a ballpoint pen.
A couple of caricatures.
Neighborhood cats.
And a jogger.
Check out the texture on these and see if you can guess what he used to draw on this time.  The answer will be below but try to guess first.
v
v
v
v
v
v
v
v
v
v
v
v
v
v
v
v
v
v
It's the cut out tops of styrofoam egg cartons.  I wish I had met this man.
I know his grandson is going to appreciate the journals which make it easy to look at the art without it falling to pieces anymore.


A Quilt Repair While I Was On Vacation

 I went to visit my parents for a month and while I was there I repaired a quilt. Sorry the image is not very good, it was taken with my pho...