Showing posts with label embroidery. Show all posts

Tuesday, July 10, 2018


I was having trouble seeing to cross stitch on linen.  I got some 3.25 readers but it was still too difficult.  The aida cloth is much easier to work on than the linen.  I think the issue is not just my eyes but also the gray threads against the beige fabric.  But if I get enough light on it, I can now see it.
This is the pattern I'm using for a cross stitch of my cat that just passed away of old age.  It looks just like him.

Just so you know, the darkest area is the cat's nose.  You can see how the lightest gray kind of blends in with the fabric which is actually a beige color.

I also repaired some holes in the back of a favorite shirt for my sweetheart.
The front of the shirt has a fish in these colors so I added one to the back to cover the holes.  The fins are a bit wonky but it was too small to applique it any better,

Tuesday, August 15, 2017

Lamb of God Miniature Bible Embroidery

I've completed another mini bible cover.

This one has the Lamb of God on the front, his wool of made of silk French knots.


The back has white silk lilies of the valley in keeping with the spring theme.
I also used gold & silver metallic thread and cotton thread.

I have another planned and it will be all white with some beading.  Something suitable for a wedding.

Tuesday, August 1, 2017

Celtic Cross & Thistles Embroidered Bible Cover

I've started on the 2nd mini bible cover, this one has a Celtic cross on the front and thistles on the back.

Please excuse the wrinkles.

I'm using a combination of metallic, cotton & silk floss, though this photo really doesn't show the metallic well.  The thistle flowers and the light part of the leaves have metallic thread running through them.  

Tuesday, July 25, 2017

Embroidered Mini New Testament

I've been working on an embroidered cover for a mini bible I had.  I used a mix of silk, cotton & metallic threads.  For stitches I used satin stitch, split stitch and french knots for the pomegranate seeds.
It was appliqued onto the black base cover and gold metallic thread was used in a blanket stitch around the edge.

Then added black satin ribbons to tie the sides together as it looked rather unfinished without that.

I'm now working on a second one in purple with a Celtic cross on the front and thistles on the back.  I intend to leave the spine plain in case the buyer would like a name, initials or a date added.

This is the pocket bible it will go on.

If anyone is interested in these, they will be for sale.  Send me a message or leave a comment.


Tuesday, July 11, 2017

Bible Cover Finished! Thoughts For New Projects

I've finished the bible cover and put it on my poor overused bible.  It looks much nicer than the old tattered one.


I'm thinking of doing some covers for the small pocket New Testaments and seeing if I could sell any.  Small would be less expensive as the embroidery takes hours.   I could also add beads as I have tons of them on hand. 
Here are some I found on Pinterest that inspire me:
Any opinions?

Tuesday, July 4, 2017

Embroidered Square & A Free Pattern

I've finished the embroidery on my quilt square.  The stitches I used were running stitch, backstitch, satin stitch, a fill in stitch and french knots.

Here's the drawing I made which I'm posting as a free pattern in case anyone wants to use it.  Right click on the image and choose 'save image as' to save to your computer.  Print out in any size you choose.  My embroidered square is 6" x 6".

Here are my YouTube videos on this piece.


Tuesday, November 1, 2016

More Progress on the Bible Cover

Since the ribbon I ordered was all wrong, I decided to try a 1/8 inch red ribbon as a border for the spine of the cover and I believe it worked brilliantly.
Here's a closeup.

I don't think I will add anything more for the spine.  I'm thinking about trying it for the front of the cover, accented with a couple rows of embroidery.  Either the red ribbon with purple and gold embroidery or purple ribbon with red and gold embroidery.  That's if I could find some purple ribbon in the right width and color.  
And I still need to do the red embroidery around the edge of the back of the cover.  It's to cover any raw edges like at the corners and to give it a more finished look that is consistent.  It would be narrow like 1 or 2 rows of a stem stitch, same as I would do on the front.


Tuesday, October 25, 2016

Update to Bible Cover and a pair of UFOs

After looking at the ribbon trim I ordered, I decided it was too wide and the black background was not right.  So for the back of the cover I turned under the edges and appliqued it.  I will probably add a line or two of red embroidery to match the inside edge of the border and to cover the threads sticking out at the corners.  Not sure yet on the rest of the cover but I'm thinking that applique will work on the front also.
However, in looking for some thread I found 2 UFOs that were almost finished.  

Talk about perfect timing!
All I needed to do was finish the outlines on both and the hat on the top witch!

Now all I need is 2 simple frames, I think a Dollar Tree visit is in order for tomorrow.

Tuesday, October 18, 2016

How To Remake A Bible Cover From An Old One

My bible cover was in pretty sad shape.  So I decided to make a new one using pieces from a different old one.
I chose a royal blue heavy cotton fabric and doubled it for strength.  Then I cut apart the old bible cover I had on a slightly smaller bible that I have not used in years.  I also used Fray Check on all the cut edges of those pieces.  I actually embroidered a border on the spine piece but did not like how it turned out, so I frogged it all out.
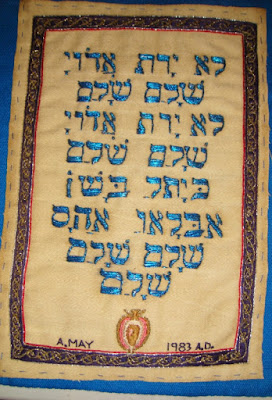
These are the pieces cut out and tacked into place.  As you can see I embroidered this cover in 1983.  The threads are all silk or metallic.
On the front piece the cross is surrounded by vines with pomegranates, one pomegranate for each book of the bible.
The back piece is a favorite worship song my old pastor wrote and we sang it in Hebrew and English.  It is a simple song about how the Lord is our Peace.  The little thing at the bottom is a split in half hawthorn berry, a personal symbol for myself.

So I am hunting for a nice ribbon, braid, etc to use for a border around the pieces, possibly in purple.  Maybe I can get to Michael's or Hobby Lobby when we go to Abilene on Thursday.  Unfortunately that hour's drive is the closest to any place that carries a variety of sewing items.

Tuesday, October 27, 2015

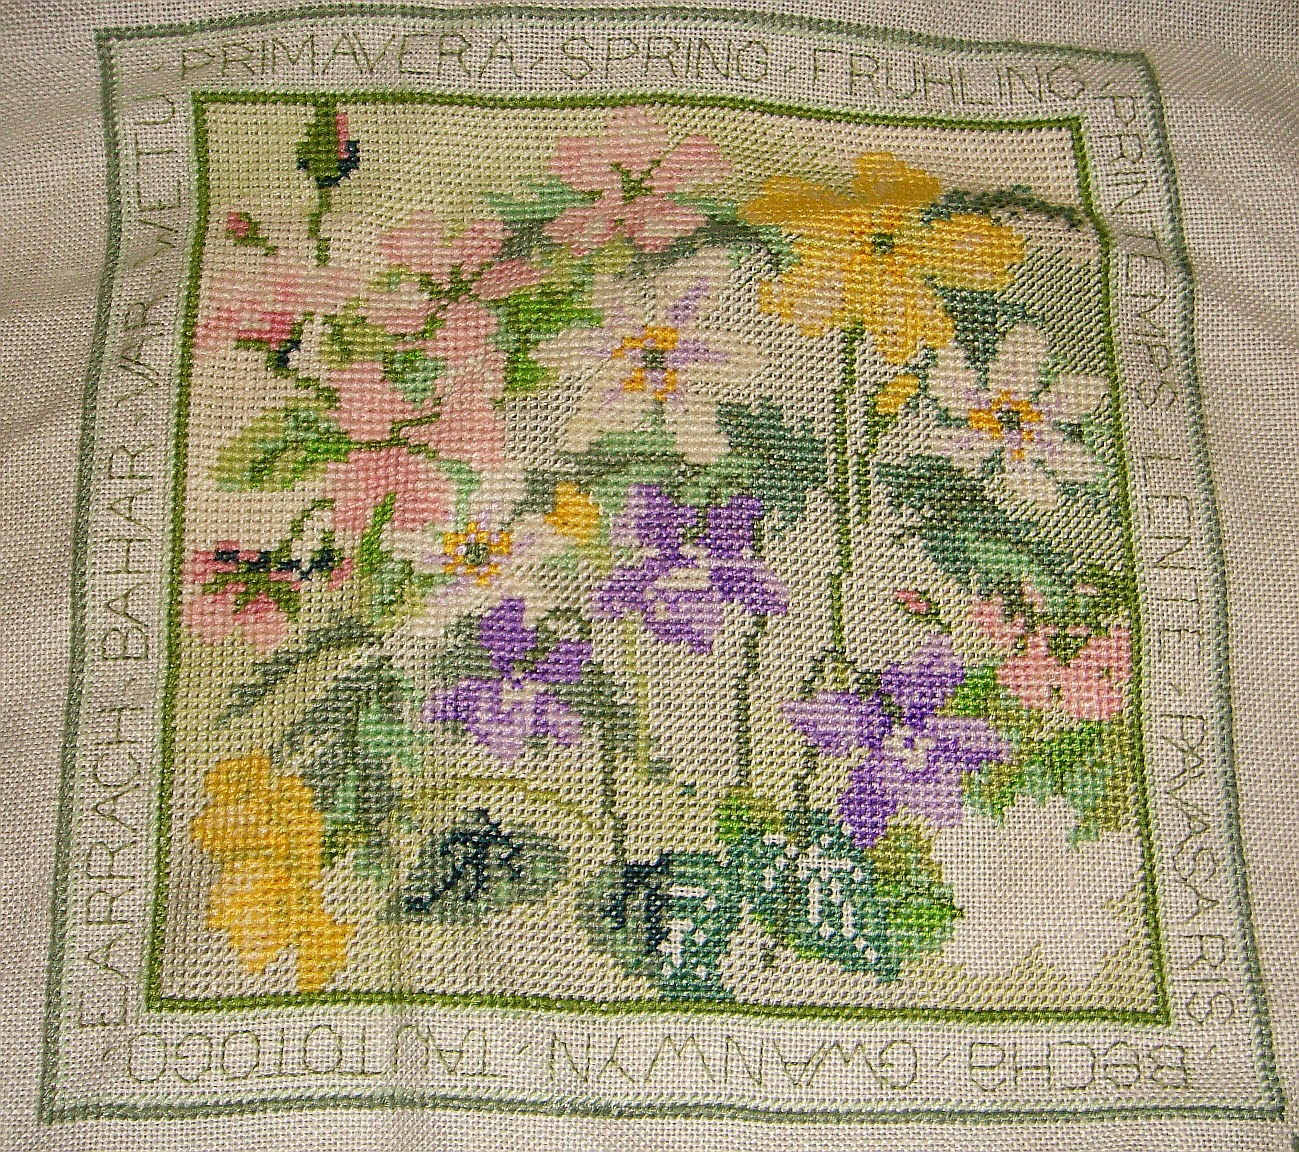
The 4 Seasons Cross Stitch Done & Framed

The 4 Seasons are finished and I thought I would show how I mounted  the piece.  I used a piece of foamcore board cut to size (15" x 15") and centered the fabric.  Then I used silk pins to hold it in place, working from the center out, opposite sides first to keep it centered.
I stuck the pins into the foamcore about halfway and about an inch apart.
Then I went back around adding more pins about 1/4" apart, then once again in the center of those spaces.  Always checking the alignment of the weave against the edge of the board.  When done all the pins got pushed all the way in.  I had bought a box of 450 pins and had about 1/3 of them left over.
I could have stopped there and just folded & taped the excess fabric but decided to lace it as an extra measure.  I used doubled pieces of quilting thread, corner to opposite corner first.  Taking 3 stitches for each lace end.  When I ran out of thread, I used an overhand knot to connect the new thread to the old and kept going.
Lacing all one way.
Then the other way.  Pieces like this really should be laced and not pinned but I had read that the pinning worked so nicely with little chance of rusting pins so I thought I would try it.  If I had not used pins that stay in the board, I would have sewn a stronger twill tape to the edges and then laced.  
Not perfect but it's hard with linen.
And here she is framed in my Goodwill $3 frame that was a perfect fit.  No glass as there was no room for it.  A little orange oil polish and the frame looks like new!

The back got a dust cover and sawtooth hanger.  Now all I need is a place to hang it!


Tuesday, October 20, 2015

Four Seasons Cross Stitch is Finished

The Winter square is done and that means the entire 4 seasons are done!
And you get to see it without wrinkles for once.

The next step is to stretch it over a board and frame it.  I picked up a rare square frame at Goodwill, I need to see if it will fit now.  If not, the framing will be on hold until I find a frame to fit.

P.S. I just tried out the frame and it is actually a perfect fit!  I never measured it when I found it, it looked about right and it was square which is hard to find.

Tuesday, September 22, 2015

4 Seasons Cross Stitch Update

Despite catching up on things after being ill for 5 days, I managed to finish the last berries and leaf on the Autumn square.
Now I only have background in the lower right corner and some top stitching on all 4 pieces and it will be done!

I'm thinking about the craft show I'll be doing in November and I decided to package the earrings I made rather than finding or making something to hang them on.
The cards are foam pieces I cut to fit in the plastic bags and the labeling is cut from my old business cards.  Simple but nice.  It will certainly be easier to set up than sorting through a bag of earrings all mixed together.  I have an old sewing machine drawer I think will work well for holding them.  
What do you think?

Tuesday, July 21, 2015

4 Seasons Cross Stitch Update

I'm almost done with Autumn which means I'm almost done with the whole year of seasons.
So we have blackberries, rose hips and and some tiny red berries that I'm sure the birds like.  

And here's a photo of the whole piece in case you forgot what it looks like.
Don't mind the wrinkles, there's no sense in ironing it yet.

Tuesday, May 19, 2015

Update on 4 Seasons Cross Stitch

Autumn is coming along slowly as there's a lot of other stuff to be done right now, in between rainstorms that is.  We need the rain to help fill the lake again as that's where the town's drinking water comes from, but a day or two between storms would be nice as the yard is squishy...and it's caliche, meaning rock!  I can hardly use the wheelbarrow as it gets stuck.

Anyway, here's a photo update on Autumn.
I love the colors of the berries.  I'm not sure what kind sets fruit in fall but they look like blackberries.

Speaking of blackberries, I finally received my plant order after 2 months, which included 2 thornless blackberry bushes!  At 3" tall it will be a while before I see berries but these are supposed to produce 2-3 times a year.  At the very least I won't have to deal with thorns.

Tuesday, April 28, 2015

Summer Cross Stitch is Done

We had some rainy days, thank the Lord, so I was able to finish the Summer square on my embroidery piece.
As with the other squares there is some embroidery that will have long stitches and I will wait until I am done with all four seasons to complete that part so the stitches do not get pulled.  On this square there are some vines and the bee wings to be added.
Seeing the whole thing from a bit of a distance I believe the red flowers are cosmos, not poppies as I originally thought.

I found these patterns on Pinterest and the images are not the best to work from but free fits my budget perfectly.  

When I don't have the color it calls it calls for I am improvising and using something close that I already have.  I have 5 boxes of DMC threads, I need to be using it and not buying more.  

Years ago I had a few skeins and then bought a starter pack of DMC threads that were smaller than a whole skein.  Then I bought colors I needed as time went by.  A friend gave me her 3 boxes of thread when she could no longer do embroidery and I always pick up baggies full I find at thrift shops.  Black & white seem to be the main colors I actually buy at the store though I did pick up 2 others for this piece that were different than anything I had.

Monday, April 13, 2015

How I Keep Track of a Cross Stitch Design

This is my current embroidery project, the four seasons, cross stitch done on linen over 2 threads.  Winter and Spring are done and I am working on Summer.
  
I don't know about you but I have always had trouble keeping track of where I am when working on a cross stitch project.  And with my eyes getting older it gets a bit harder.  So here's how I do it to save my sanity.
I'm sure I'm not the only one to do this.  I use colored pencil to color in the stitches I have worked.  Usually I use the light colors like yellow.  I also mark the center lines in red because most charts are split into pieces.  Some areas are harder to see because of the quality of printing on this one, so I used a red pencil in some areas to designate that particular color.
I also tend to work in block areas, I choose a corner (or the center) to begin and work outward with connecting colors.  I don't like to skip all over doing all one color because it is too easy to miscount and I hate frogging out stitches.

Most times I will also use regular sewing thread in a long running stitch to mark sections and/or borders before I begin.  A nice bright contrasting color works very well and the thread is easy to clip and pull out when you need to work that area.

If you don't want to color on your pattern, make a paper copy that you can throw away when you are done.

I hope this helps someone out there and if you have other techniques that you use, please share in the comments!

Tuesday, March 24, 2015

Spring & Summer & Bunny Updates


I've finished the last flower for Spring and the border for Summer as well as a tiny area in the corner.
More background that you really can't see until it is all done, that's pale blue and off white with bits of green.
There really are 4 bunnies in there, eyes are open and they sometimes come out of the nest now.  It's getting harder to keep them safe, the neighbor's cat is showing some interest and I can't keep him locked up at night as he's not my cat.  So far so good though.

Tuesday, March 17, 2015

One More Flower & Bunny Foo Foos

First of all, Happy St. Patrick's Day!

I almost have the Spring cross-stitch square done, just one more flower to go.  I tried but was too tired to finish it last night.
Here's why I was tired:
Those are baby bunnies!  Aren't they adorable?  Right now they are the size of a mouse.  My cat found the nest in our backyard and thought they made great playthings.  They are currently caged off with chicken wire which I have to remove at night so the mama bunny can feed them.  Based on photos I've looked at they appear to be about 2 weeks old and won't be able to be on their own until about 6 weeks.

Kind of puts a crimp in my garden plans because the nest is where I wanted to put in a raised bed.  I planned for four 10" tall beds along the fence line and even if I skip over this area, what happens when the melons and tomatoes start growing?  Are the bunnies going to eat the plants up?  Geez, sometimes Mother Nature just does not want to co-operate.  
I do have tiny sprouts up on 2 okra and 1 tiger melon however.  Last year seed starting was a dismal failure except for some jalapenos.  So I'm hopeful this year will be better. 

A Quilt Repair While I Was On Vacation

 I went to visit my parents for a month and while I was there I repaired a quilt. Sorry the image is not very good, it was taken with my pho...